Showing posts with label Plans. Show all posts

Cabin Wall Framing. Finally.

Whew, finally. We get to constructing the cabin walls. This is the fun part for me. As a former carpenter, framing construction is well-within my comfort zone.


Initially, it looked like it would be easy as pie. I planned to simplify the standard stud construction to reduce weight: (single) sole plate + studs + (single) top plate + simplified door and window openings.


But as I started planning out the end walls, I realized I needed access to the space under the decks, and so the end walls had to work around that.


The side walls were a little simpler and more conventional.


I was using all recycled Doug Fir 2x4s from the salvage pile at the dump, ripped from 3-1/2 inches to 3 inches.


Looking one more time at my wall detail, you see that the coaming (labeled "edgeboard") is cut into the wall studs.  So I had to dado a sizable groove into each of my studs to accept the coaming.

Real woodworkers have tools for this, but I had to resort to some deft skillsaw work. And without a working wood chisel, I was sadly using a flat head screwdriver.  Embarrassing. But it worked reasonably well.


Next, I assembled the walls on the floor of the barn, and then awkwardly personhandled them solo into place in the boat.  Every connection was adhered with construction adhesive and nailed.


In the boat, the wall framing was glued and screwed.


Two walls.


Three.


With window framing and blocking added.


And finally four finished walls. In this last photo, you can see the doorframe to the head on the right.

A big day, for sure. Time for a cigar.  Next up, more mistakes were made.

Motor Well, A Mini-Project Unto Itself

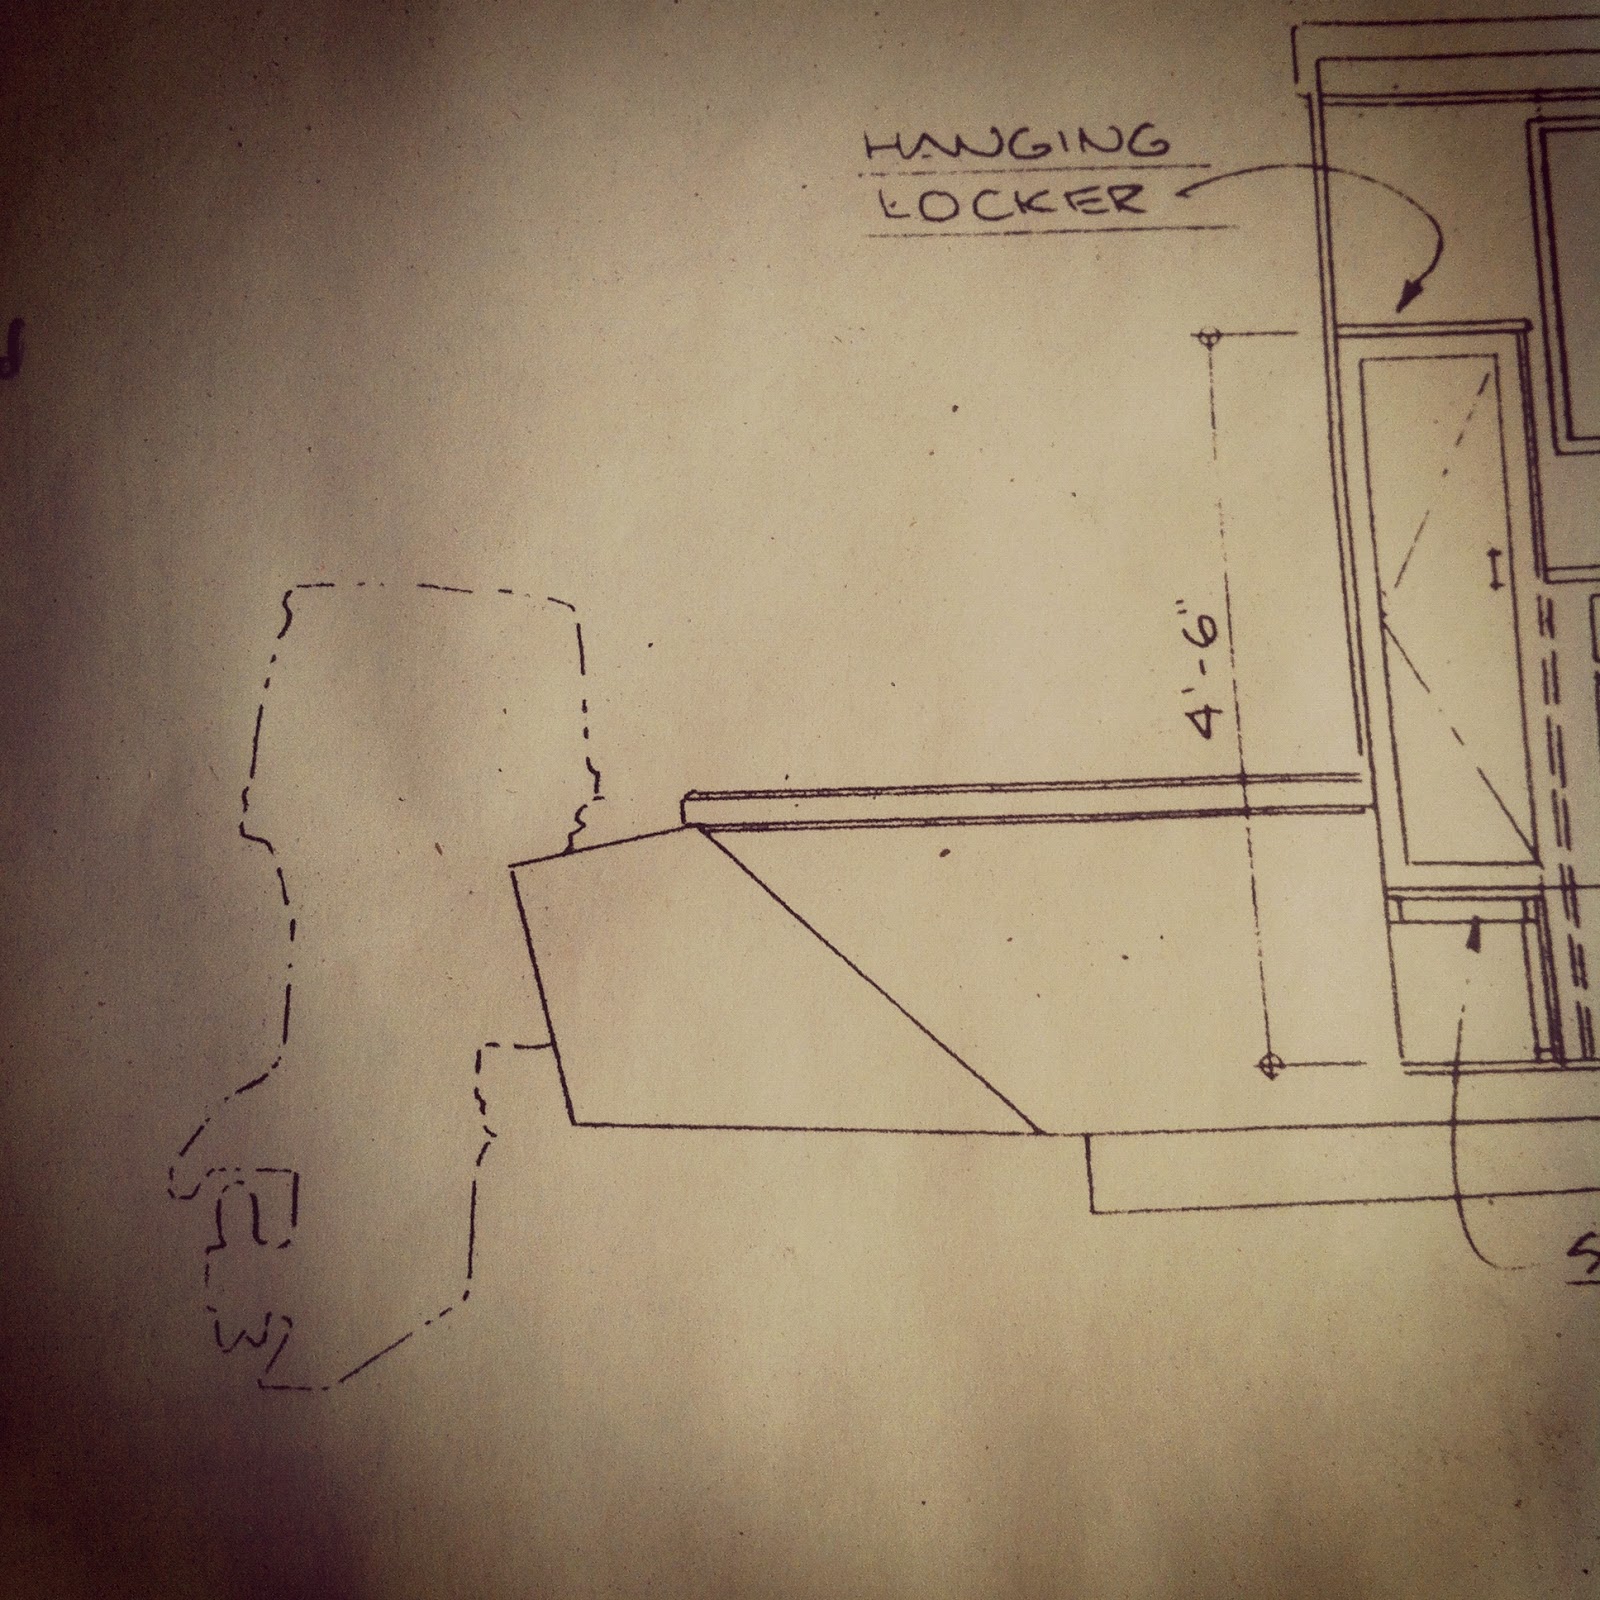
Oh, the motor well.  Seems simple enough.  Build a box that bolts to the back of the boat, upon which the motor clamps.

I've been working on the motor well since the days of the Troublesome Skegs and before the Boat Flip.

Turns out that though this earns only a brief paragraph in the Glen-L Waterlodge instructions, it is really quite time consuming.


And though the motor well shows up on various views in the plans three times, it still leaves a lot of unspecified dimensions. Despite a lot of fancy maths including tangents and the Pythagorean theorem my first effort to suss out the missing dimensions and angles was a loose collection of mismatched angles and incorrectly cut two-by stock.


The challenge of the motor well is that there are few right angles, several that are very close, but not quite 90 degrees, several similar obtuse angles and some crazy acute angles. The difficulty lies in translating perfectly good angles and lengths to actual measurements and cuts.


My second attempt -- salvaging as much of the previously cut wood as I could -- discarded the mathematical approach and did it the way a carpenter would. Rather than cutting the two-by stock first, I marked out the known angles and measurements on plywood, solving the unknowns as I went along.  I cut out the 5/8" plywood giving me a useful template that would be used for the sides of the motor well.  Finally, I measured and marked the two-by members to match the template. Magic!


After fitting everything best I could, I epoxied everything together to give me two assembled sides to the motor well.


This was a logistical challenge similar to assembling the side stringers -- you want to align the two-by members facing up, but the screws need to go in from the other side.  In this case, the motor well sides were small enough I could assemble the two-by members facing up on saw horses, then put a few screws in from the bottom to hold them together.


After that, I flipped them over and screwed the shit out of them.  All done while everything -- drill, screws, wood, hands -- are covered in sticky goo. Fun!


I completely encapsulated the wood inside the motor well with epoxy to protect it from decay.


I know from experience assembling boxes, it is easy to discover in the end that you've created a parallelogram that doesn't fit your last side.  How to prevent this?


I temporarily screwed the bottom on the motor well to square up the sides before assembling the rest of the box.  I'm using wax paper to prevent the epoxy from accidentally adhering the bottom.  In fact, the bottom won't go on until after the motor well is already bolted on to the hull to allow me access to the bolts.


Now, I can go ahead and epoxy and screw on the back and the framing members.


We have to bolt this thing in with 5/8 carriage bolts no greater than six inches apart.  Turns out that's a lot, really.


I marked the bolt holes and drilled from the outside of the motor well using a carpenter's square to get holes perpendicular to the rake of the hull.


Sixteen bolts for this 2 foot square box hanging off the back of the boat.


The heads of some of the carriage bolts would fall on angled members, and so needed to be countersunk.


I needed to temporarily hang this thing so I can mark the bolt holes on the hull.  I built a little support jig that took into account the missing bottom piece.


Here is the motor well on the boat.  Fancy.


Using a wax china pencil, I marked the bolt holes for mounting the motor well.


It seemed like madness to drill 16 holes in my previously watertight boat hull.  Soon, we'll finish the outside of the motor well and bolt it on.

Fiberglass Seal Coat

We fretted over fiberglassing the hull so much, we put off beginning with this step for weeks.  We read and reread our instructions from Glen-L, Ken Hankinson Fiberglass Boatbuilding book, and anything else we could find.  We went over scenarios and thought of terrible things that could go wrong.  We thought it would be so harrowing and difficult, that in the end, it was a bit of letdown.

Here's where we left the boat last time.  Filled, shimmed, routed, sanded lovingly.  Lawrence came by a couple times and asked, "What are you building, a boat or a piece of fine furniture?"


Before we started the day, we had to wipe the whole boat down and make sure there was no sawdust, grease, debris, or anything anywhere.


But really, this was just the seal coat, the first of four or five coats we'd put on the hull.  We wouldn't even get out the glass cloth until the next coat.

And now a quick primer on fiberglass:  Fiberglass is a composite laminate material.  The layer(s) of spun glass cloth or mat embedded in a matrix of polyester or epoxy resin are what gives it strength.

In some boats where the hull derives its strength from the fiberglass, it is typical to use alternating layers of mat (a loosely woven nest of randomly aligned spun glass) and glass cloth.  In our boat, the fiberglass covering on the plywood hull served only the purpose of keeping it watertight and creating a durable wear-resistant maintenance-free surface.  So we had only to put one layer of glass cloth between several layers of epoxy.


There are many methods of applying fiberglass to a boat hull, but they break down to the so-called wet and dry methods.  "Wet" means the fiberglass cloth (or mat) is laid over a just applied layer of resin and then "wet out" with more resin on top.  This sounded hectic. We imagined laying cloth over a wet sticky layer of resin and fighting wrinkles and having the cloth misaligned and pulling our hair out and getting sticky head to foot.

We were relieved to discover in our Glen-L instructions that they recommended the dry method.  "Dry" means simply that the first coat is rolled out without the cloth and allowed to set.  Then the cloth layer is laid out over this dry layer and more resin on top of that to wet it out.  This allows us to carefully align the cloth without the stress of either sticky goo or the ticking clock.


In this first seal coat, all we were doing was covering the hull with epoxy.  Kai mixed up big batches of epoxy and put them in paint trays for me to roll out with a dense foam roller.


Then Kai came around with extra resin and touched up spots I'd hit too lightly and brushed down any air bubbles.  Because we weren't mixing the resin with filler, it had a longer pot-life and so didn't tend to kick off early, even though we were mixing it in larger quantities.


The result was beautiful, though vaguely reminiscent of a horribly outdated style of 70's handmade varnished pine bedroom furniture.


Though it was a hot day in the barnyard, we were feeling pretty good about our work and the results.

Opinions are like assholes...

Everyone's got one.

Every now and then I'll ask a boat-related question on a public forum or email list.  It sure isn't a problem getting people to weigh in with their opinion, that's for sure.  The challenge, actually, is picking through the dross of misunderstanding, inaccurate information, speculation, and completely made-up answers to find the grains of expertise and knowledge.

This is precisely why I picked the boat designer I did, because they has already provided me with a wealth of trustworthy and well-respected information about boatbuilding before I ever bought my plans (read Boat Plans: Choices Made and Not Made).

For the most part, during my build, I've hewed pretty close to the plans and the recommendations of the boat's designer.  I'm all for experimentation, but I'm also deeply respectful of the experience and expertise of those who came before me.


In the planning stages, there were boats I liked that came close to what I wanted, but differed in some way from my vision of our little shantyboat.  I definitely flirted with the idea of taking those plans and making significant modifications.

I resisted that urge, for the most part, and picked a boat design that met my needs, at least in terms of hull design.  


For the changes I did plan to make, I had the good fortune to be able to talk to my boat's naval architect and get his advice on these modifications (read Questions for the Old Man).

The opinion in boatbuilding forums is often to take this design and lengthen it, or add one of those or one of these.  And I'm sure for those experienced boatbuilders, such modifications would be a breeze.  But what about the first-time boatbuilder, the person just starting out?

I think people get excited sometimes about sharing what they know, but forget that there is a bigger picture.  Too often, I think that picture holds the very real possibility of a half-built boat collecting rainwater in the backyard of a frustrated amateur boatbuilder.