The Cabin Has a Floor

Let's put in a floor!  This is the floor that will be inside the cabin.


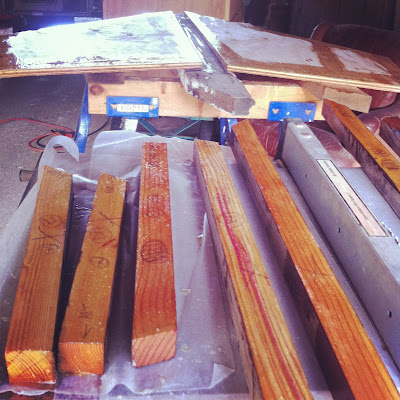
Remember the beautiful old redwood I got from the chicken shed that Jen, Kai, Alex and I salvaged last year? I wanted to use these thick 1x12s for flooring in the boat. The also have the advantage of putting some weight down into the hull of the boat.


I had a worry that using straight boards for floorboards, there would be little cracks between them that would constantly filter dust into the bilge and possible squeak when you walked on them. So I had the idea to route the edges to make them lap each other.


Ten boards, eight foot long, two edges each. That's a lot of routing.


Actually, none of the boards were eight foot long, so they had to go in piece by piece.


I used construction adhesive and exterior nails to secure the flooring down. The adhesive will keep the flooring from squeaking and slowly coming up. Modern construction adhesive is so strong, that when you take up plywood that has been adhered down, it comes up in pieces.


It ended up having a neat look.


I wanted to put hatches wherever I could under spaces that were not occupied by fixed objects such as the head, the galley, and the woodstove. After the first three boards aft, I had to start getting strategic with my flooring installation.


It slowly came together. I tried to make the hatch covers match the surrounding boards best I could.


Here's a really bad idea: Using wood that has been nibbled by termites. Some of the wood when I routed it, not only revealed whole termite empires, but actual live buggies.


I went to the lumber yard and drenched everything in Copper Green. This is a special (and more expensive) clear preservative. By clear they actually mean, kind of a deep amber -- but that's preferable to the bright green of the regular stuff.


After all the flooring and the hatches were in, I attacked it with the belt stander, knocking down edges and leaving the different shades a bit more uniform.


I quite like how it came out. I made mismatched hatch handles for each of the four hatches. Can you spot all four?


Here's one of the adorable little hatches open.

Obsessive woodworking, top side

With both decks on, I could be an obsessive woodworker again.


First I shimmed up any really large gaps with thin pieces of wood, epoxying them on. Then I routed all the edges.


Once I sanded down the bumps and the previous coat of fiberglass, there were still some larger structural gaps that I wanted to fill with thickened epoxy.


Some of my epoxy kicked off Before Its Time with billows of smoke. Exciting.


I filled the small spaces and the screw holes with latex wood filler. Filling small cracks is more than aesthetic, when the fiberglass goes over the decks, any cracks or spaces will create air pockets behind the fiberglass. That's bad.


Then I sanded everything smooth as butter with an orbital sander. Fancy.

Installing the aft deck

I put the aft deck on. Thought you should know.


There were some awkward places in the aft section of the boat where the stringers didn't quite line up. One stringer dipped lower than the rest. So I had to add on little thin wedges of wood to the tops of the members. I am a madman with a circ saw and often do ridiculously fine cuts with this not-so-precise tool. Cut, epoxy, attack with the belt sander.


Voila! You'd never even know. Definitely not once the deck is on.


Putting the actual deck on was a breeze. You only get photos of the finished results, because what used to worry the hell out of me, mixing up epoxy, brushing both sides, mixing up a thicker batch, applying that to the structural members, and then applying stainless steel screws every six inches to the plywood is really no big deal these days.  I did it alone and it was done before I even had a chance to take any photos.


Notice the brilliant bow in the center of the deck? That's part of the Glen-L design to allow water to run off.

I know I still have to get under there to bolt in the motor well (and the stern tie-downs), but my excitement got the better of me.


It totally paid off: Hazel and I have already sat on the back deck enjoying lunch and a well-deserved beer in the shade of the willows.


Things organized neatly.

Motor Well, A Mini-Project Unto Itself

Oh, the motor well.  Seems simple enough.  Build a box that bolts to the back of the boat, upon which the motor clamps.

I've been working on the motor well since the days of the Troublesome Skegs and before the Boat Flip.

Turns out that though this earns only a brief paragraph in the Glen-L Waterlodge instructions, it is really quite time consuming.


And though the motor well shows up on various views in the plans three times, it still leaves a lot of unspecified dimensions. Despite a lot of fancy maths including tangents and the Pythagorean theorem my first effort to suss out the missing dimensions and angles was a loose collection of mismatched angles and incorrectly cut two-by stock.


The challenge of the motor well is that there are few right angles, several that are very close, but not quite 90 degrees, several similar obtuse angles and some crazy acute angles. The difficulty lies in translating perfectly good angles and lengths to actual measurements and cuts.


My second attempt -- salvaging as much of the previously cut wood as I could -- discarded the mathematical approach and did it the way a carpenter would. Rather than cutting the two-by stock first, I marked out the known angles and measurements on plywood, solving the unknowns as I went along.  I cut out the 5/8" plywood giving me a useful template that would be used for the sides of the motor well.  Finally, I measured and marked the two-by members to match the template. Magic!


After fitting everything best I could, I epoxied everything together to give me two assembled sides to the motor well.


This was a logistical challenge similar to assembling the side stringers -- you want to align the two-by members facing up, but the screws need to go in from the other side.  In this case, the motor well sides were small enough I could assemble the two-by members facing up on saw horses, then put a few screws in from the bottom to hold them together.


After that, I flipped them over and screwed the shit out of them.  All done while everything -- drill, screws, wood, hands -- are covered in sticky goo. Fun!


I completely encapsulated the wood inside the motor well with epoxy to protect it from decay.


I know from experience assembling boxes, it is easy to discover in the end that you've created a parallelogram that doesn't fit your last side.  How to prevent this?


I temporarily screwed the bottom on the motor well to square up the sides before assembling the rest of the box.  I'm using wax paper to prevent the epoxy from accidentally adhering the bottom.  In fact, the bottom won't go on until after the motor well is already bolted on to the hull to allow me access to the bolts.


Now, I can go ahead and epoxy and screw on the back and the framing members.


We have to bolt this thing in with 5/8 carriage bolts no greater than six inches apart.  Turns out that's a lot, really.


I marked the bolt holes and drilled from the outside of the motor well using a carpenter's square to get holes perpendicular to the rake of the hull.


Sixteen bolts for this 2 foot square box hanging off the back of the boat.


The heads of some of the carriage bolts would fall on angled members, and so needed to be countersunk.


I needed to temporarily hang this thing so I can mark the bolt holes on the hull.  I built a little support jig that took into account the missing bottom piece.


Here is the motor well on the boat.  Fancy.


Using a wax china pencil, I marked the bolt holes for mounting the motor well.


It seemed like madness to drill 16 holes in my previously watertight boat hull.  Soon, we'll finish the outside of the motor well and bolt it on.

Protecting the Bilge

Water is the enemy of wood longevity. Protecting the wood inside the boat, especially in the bilge is critical. Here's the plan, slightly ridiculous in it's conservatism.
  1. Two coats of Copper Napthenate (Copper Green) to prevent bacterial and fungal decay.
  2. Two coats of water-based exterior latex primer.
  3. A coat of water-based exterior latex paint.
First though, I wanted to make sure that water in the bilge could flow through the framing members and would not accumulate against one side of the frame. Traditionally, this is called a limber hole.


Now on to the wood preservation: First Copper Green.


Now primer.


And finally paint.


I'm not sure why, but a simple coat of paint makes me so happy.